In most cases you can easily remove Excel password protection if you’ve forgotten the password.
However, the likelihood of your success depends on which password protection method was used, as some of the four options below are more robust than others.
Excel password protection is available for:
- Sheets
- Workbooks
- File Open
- File Edit
Each method requires a slightly different solution to remove the password.
Before we get started, keep in mind that password protection for worksheets and workbooks was designed to prevent users breaking your files, as opposed to keeping your data confidential.
If you’re relying on it for this purpose, you might want to reconsider your approach. This post is written on the basis that you’re being ethical and only unlocking your own files where you’ve forgotten the password and not trying to hack into confidential files.
Remove Excel Worksheet Password Protection
Excel worksheet protection is applied via the Review tab > Protect Sheet:

A password is optional:
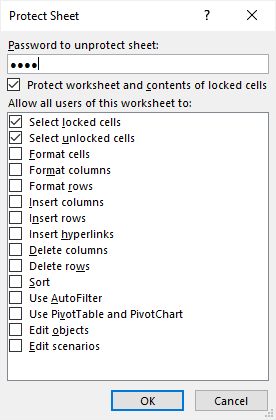
If you enter a password here and later forget it, it’s easy to unlock the protected sheet.
Unprotect Sheets Without Password
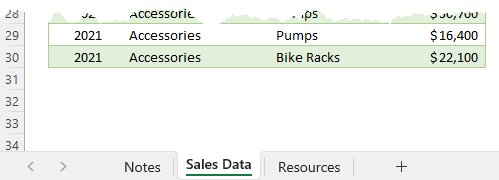
Step 1: The first thing you’ll want to note is which sheet in the file contains the password protection. Notice there are three sheets in the file. The second sheet called ‘Sales Data’ is the one protected.
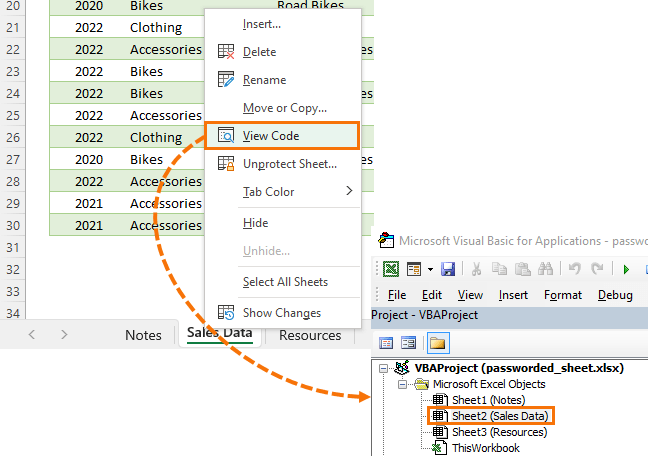
Note: if you rearranged the sheets in your file after inserting them, the numbers will not be in sheet tab order. To find out the sheet number, right-click a sheet tab > View Code:
Step 2: Close the file and make a copy just in case you make a mistake!
Step 3: Rename the file and change the extension to .zip

Tip: if you can’t see the file extensions, go to the View tab in your File Explorer and check the box ‘File name extensions’:

Step 4: Drill down through the zip file folders: xl/worksheets/ and select the .xml file for the sheet containing your password.
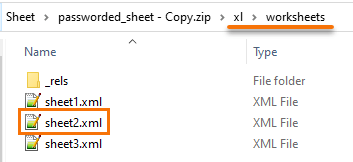
Notice the sheet tab names are not visible here, hence why you need to know which sheet you applied the password to.
Step 5: Copy the sheet .xml file to another location outside of the zip folder and open it in a text editor like Notepad.
Step 6: CTRL+F to find the text ‘sheetProtection’. Delete everything between the < > tags. See highlighted example below:

Step 7: Save the file and copy it back to the xl/worksheets folder, replacing the original file.
Step 8: Rename the file type from .zip back to .xlsx
Now you can open the file and the worksheet protection will be gone.
If you have multiple sheets with worksheet protection, you can repeat steps 5 through 7 above for each sheet.
Unprotect Workbooks Without Password
Workbook protection is applied via the Review tab > Protect Workbook:

It enables you to protect the structure of the workbook, preventing sheets being added, removed, hidden/unhidden etc.
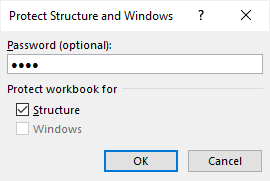
The process for unprotecting a workbook is similar to unprotecting worksheets.
Step 1: Close the file and make a copy just in case you make a mistake!
Step 2: Rename the file and change the extension to .zip
Step 3: Drill down through the zip file folders: xl/ and select the workbook.xml file.
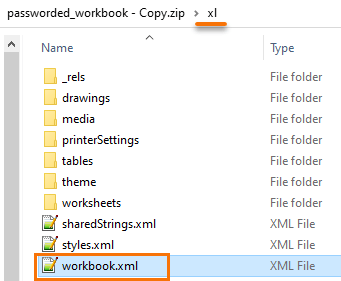
Step 4: Copy the workbook.xml file to another location outside of the zip folder and open it in a text editor like Notepad.
Step 5: CTRL+F to find the text ‘workbookProtection’. Delete everything between the < > tags. See highlighted example below:

Step 6: Save the file and copy it back to the /xl/ folder, replacing the original file.
Step 7: Rename the file type from .zip back to .xlsx
Now you can open the file and the workbook protection will be gone.

