Learn graphic design & delved into the world of Adobe Photoshop, you’ve likely encountered a powerful tool known as Blend Modes. These seemingly mysterious options can transform the way you work with images, offering creative possibilities that extend far beyond basic photo editing. In this comprehensive guide, we’ll take a deep dive into mastering Photoshop’s Blend Modes, demystifying their functions and showcasing practical applications.
Understanding Blend Modes in our photoshop course
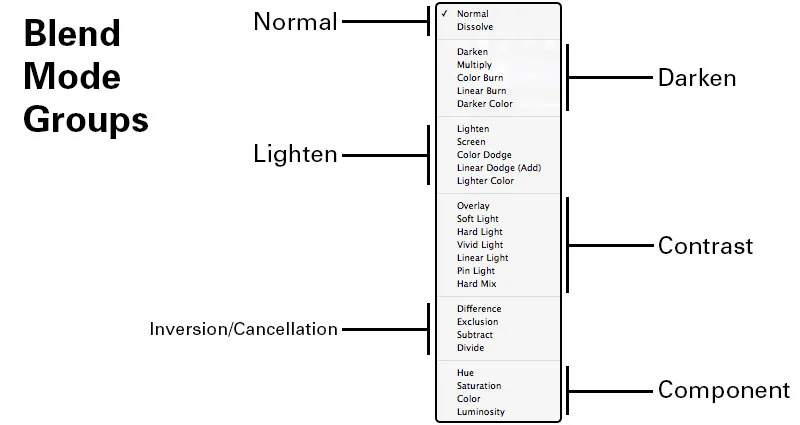
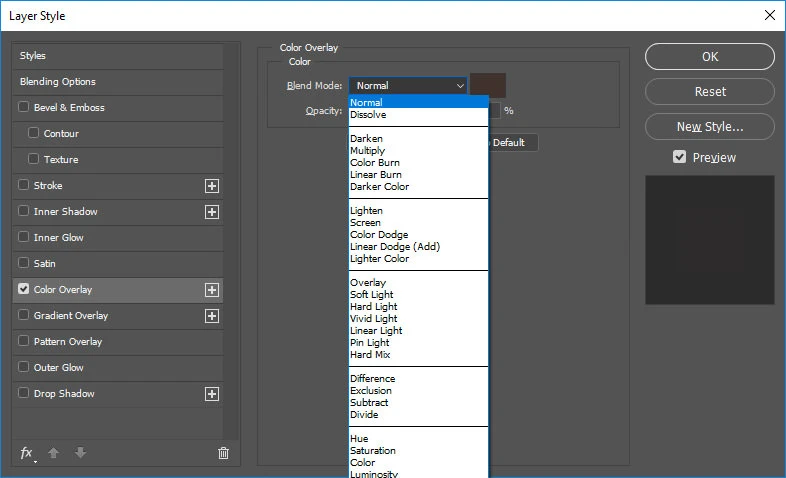
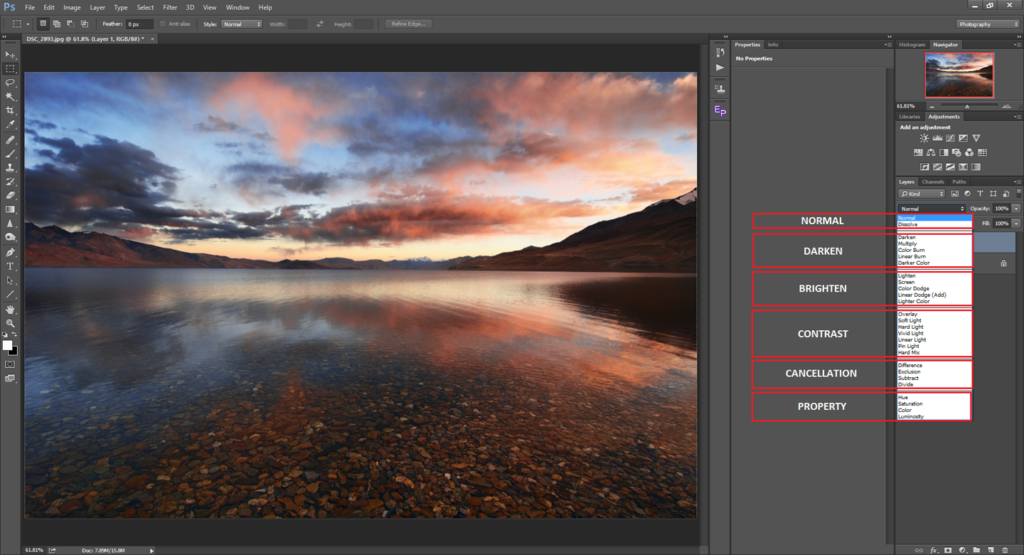
Learn Blend Modes in Photoshop which are essential for combining multiple layers and achieving various visual effects. Essentially, they dictate how the pixels of one layer interact with the pixels of layers beneath it. There are 27 blend modes in total, divided into six categories: Normal, Darken, Lighten, Contrast, Comparative, and Component. Let’s explore each category:

1. Normal Blend Modes
- Normal: The default blend mode, where pixels replace what’s underneath.
- Dissolve: Creates a speckled, grainy effect, especially useful for adding texture.
- Behind: Paints only on transparent areas of the layer.
2. Darken Blend Modes
- Darken: Compares pixel values and keeps the darkest.
- Multiply: Multiplies pixel values, making images darker.
- Color Burn: Darkens base colors to create a more dramatic effect.
3. Lighten Blend Modes
- Lighten: Compares pixel values and keeps the lightest.
- Screen: Inversely multiplies pixel values, lightening the image.
- Color Dodge: Brightens base colors, creating a glowing effect.
4. Contrast Blend Modes
- Overlay: Combines Multiply and Screen modes for increased contrast.
- Soft Light: Softens or sharpens the image, depending on pixel values.
- Hard Light: Intensifies contrast and vividness.
5. Comparative Blend Modes
- Vivid Light: Similar to Hard Light but more intense.
- Linear Light: Increases contrast and brightness.
- Pin Light: A high-contrast mode that can produce extreme effects.
6. Component Blend Modes
- Hue: Preserves luminance and applies the hue of the blend layer.
- Saturation: Preserves luminance and applies the saturation of the blend layer.
- Color: Preserves luminance & applies both hue and saturation.

Practical Applications in your photoshop course
Now that we have a basic understanding of Blend Modes, let’s explore their practical applications:
1. Learning Blending Two Images Seamlessly in your photoshop course
They are incredibly useful for combining two images seamlessly.
For instance, you can use the “Multiply” blend mode to merge a subject from one image into the background of another,
making it appear as if they were part of the same scene.
- Open both images in Photoshop.
- Place the subject image above the background image.
- Select the subject layer and change its blend mode to “Multiply.”
- Adjust opacity if needed to fine-tune the effect.
2. Enhancing Color and Contrast
You can use Blend Modes to enhance the color and contrast of your images:
- Overlay Mode: Use it to add drama and contrast to portrait photos.
- Color Dodge Mode: Create a dreamy, ethereal effect by brightening specific areas of an image.
- Vivid Light Mode: Enhance the overall vibrancy and color saturation.
3. Creating Vintage and Retro Effects
It can be your best friend when trying to achieve vintage or retro effects.
For instance, using the “Multiply” mode with a texture layer can give your image an aged, weathered appearance.
- Add a texture layer on top of your image.
- Change the blend mode to “Multiply.”
- Adjust opacity and levels to achieve the desired effect.
4. Creating Non-destructive Editing in your photoshop course
It allow you to experiment with various effects without permanently altering your original image. You can create adjustment layers and apply Blend Modes to them, enabling non-destructive editing.
- Create an adjustment layer (e.g., Levels, Curves, or Hue/Saturation).
- Experiment with different Blend Modes to see how they affect your image in your graphic designing course.
- Adjust the layer’s opacity for subtler or more pronounced effects.

Tips for Mastering Blend Modes with our graphic designing course
Here are some tips to help you master Blend Modes effectively:
- Experiment: Don’t be afraid to try different Blend Modes and opacity levels to see what works best for your specific image.
- Group Layers: Grouping layers and applying Blend Modes to the group can create complex and unique effects while maintaining organization.
- Layer Styles: Combine Blend Modes with layer styles like Drop Shadow or Bevel & Emboss for even more creative possibilities.
- Blend If Sliders: Explore the “Blend If” sliders in the Layer Style dialog box. They allow you to control the blending of layers based on the underlying layer’s luminance.
- Use Masks: Apply layer masks to restrict the application of Blend Modes to specific areas of an image, giving you precise control.
Conclusion
Mastering Photoshop’s Blend Modes is a journey that can significantly enhance your image editing and creative capabilities.
Whether you’re looking to blend images seamlessly, enhance colors and contrast, create vintage effects, or explore non-destructive editing, Blend Modes offer a powerful toolkit for achieving your artistic vision.
So, roll up your sleeves to learn graphic design, experiment, and unlock the full potential of these versatile tools in Adobe Photoshop. Happy blending!
If you are looking to join graphic designing institute in Surat & searching for photoshop classes near me, then your search ends here ! then Contact us now for more details. Enroll now & learn this awesome graphic designing course with latest tools & techniques

